how to make an instagram carousel in photoshop (MAC)
Photographers love the app SCRL. And while I continue to hear about peers using SCRL to format their concert photos, the truth is that Photoshop offers so much more versatility to your content. A few extra steps turn into a seamless, streamlined process and allow for professional quality in the same amount of time (if not quicker).
Step 1
The first step in this process is creating the dimensions for your image. The highest possible quality on Instagram is 1080×1350 for vertical posts. For a carousel of ten posts, add a zero to the width dimension so the height is 1350 and the width is 10800, and click Create.
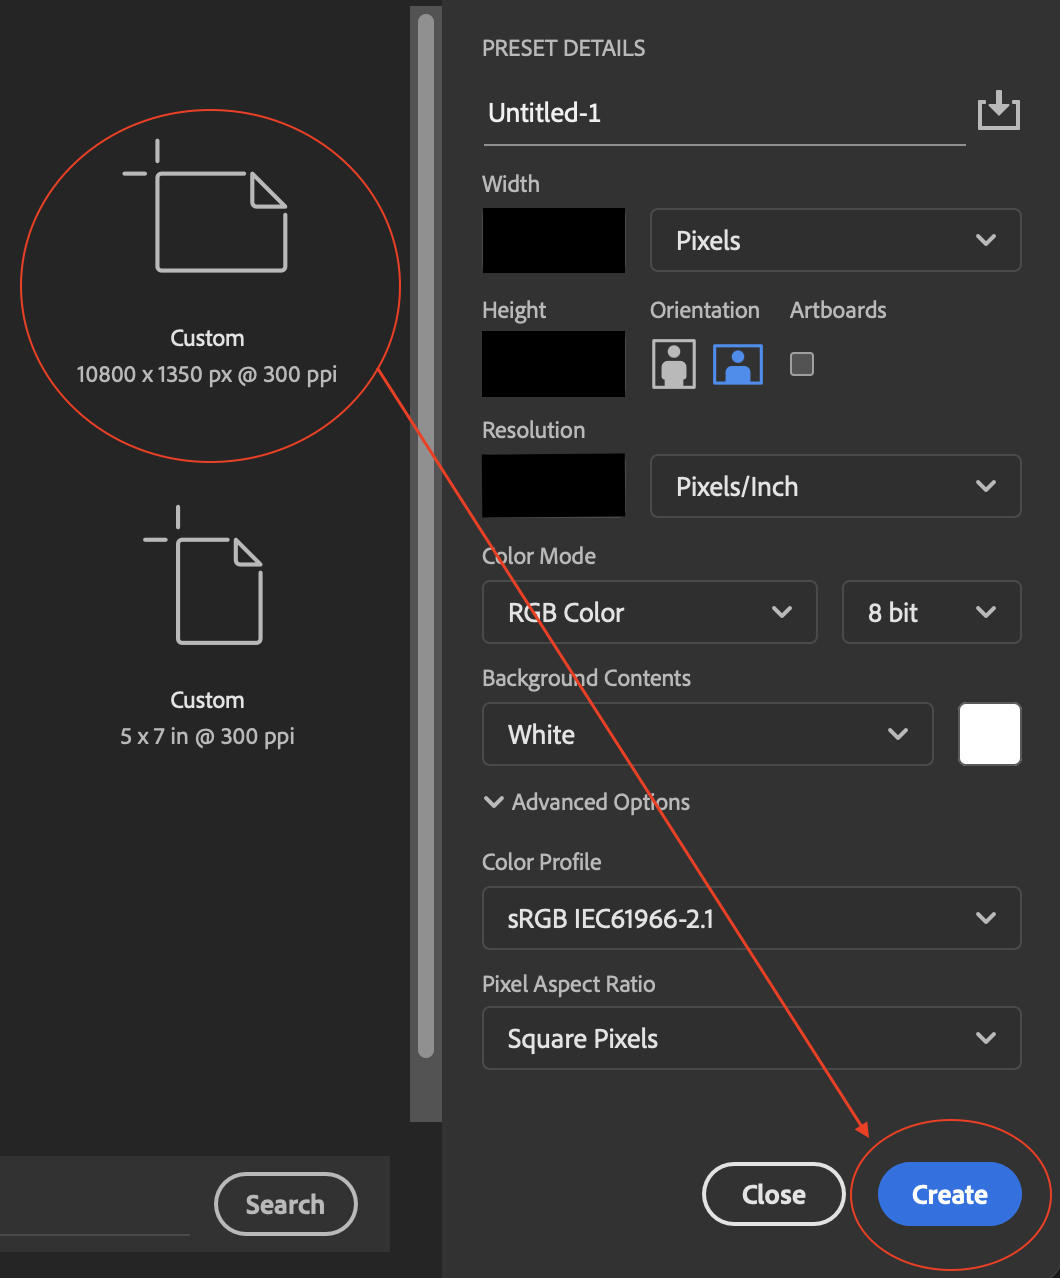
Step 1, selecting dimensions
Step 2
Next is creating your guides. Hover over View>Guides>New Guide Layout. Once you get here, Photoshop wants to know how many pieces your image will be cut into. In this case, because we set the dimensions to allow for ten vertical photos, put ten in the box.
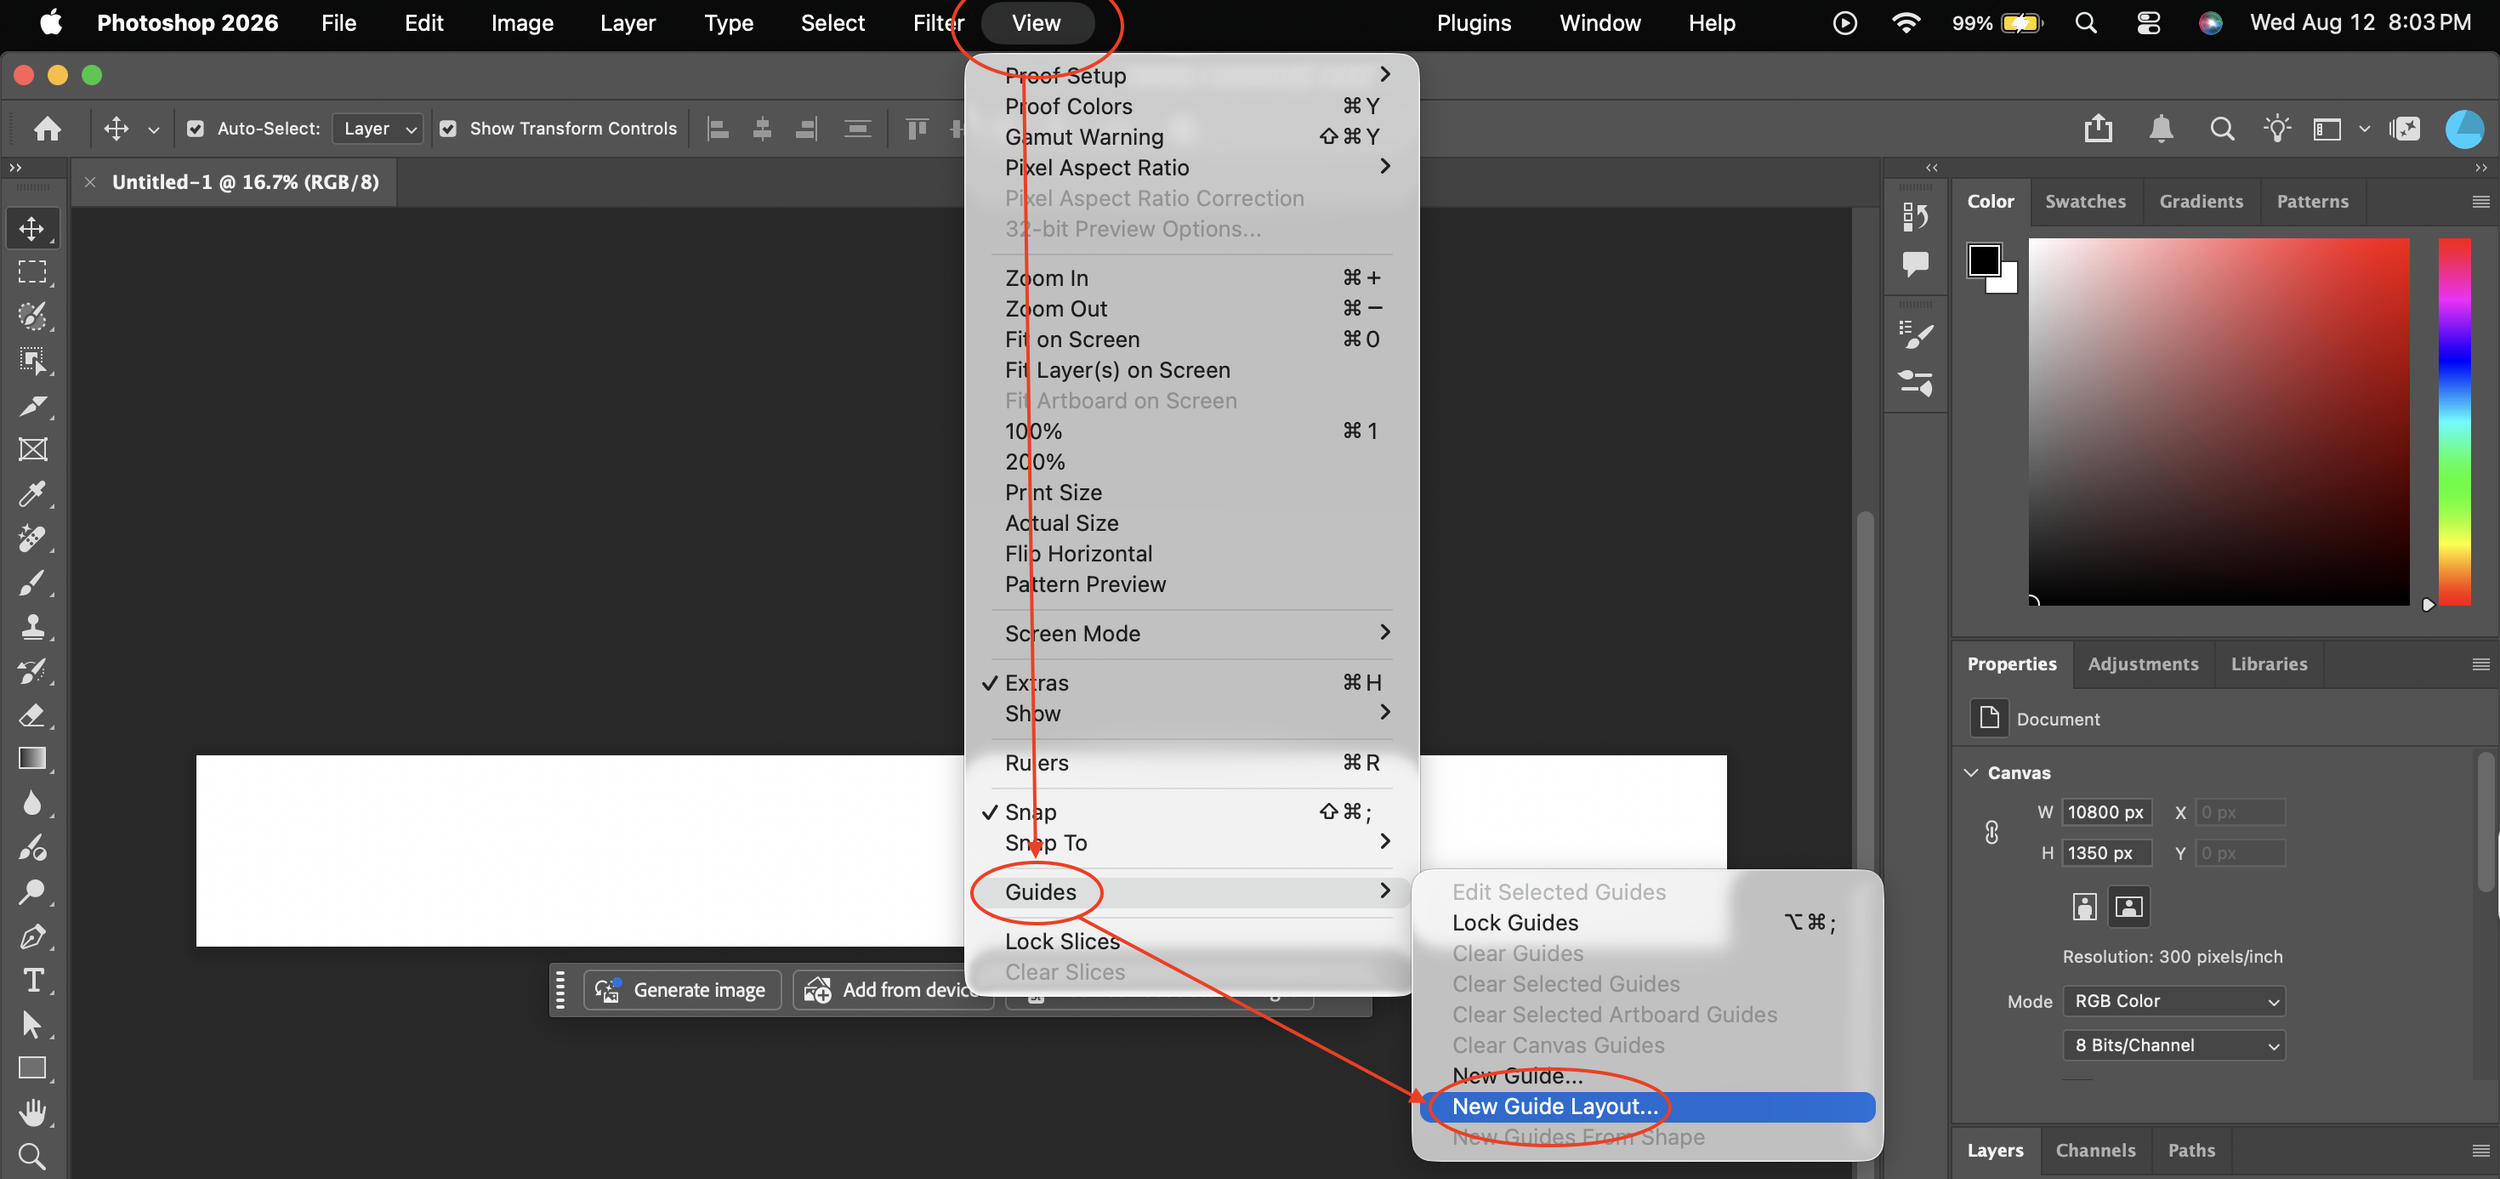
Step 2, creating guide layout
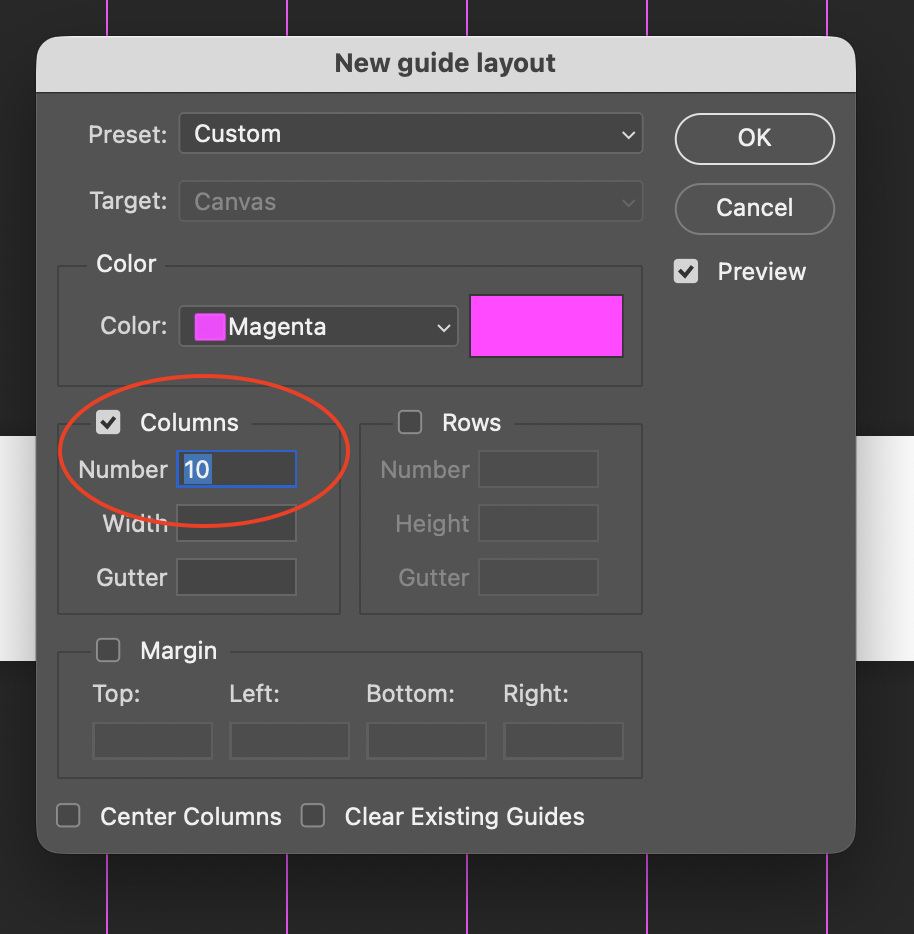
Step 2, setting up columns
Step 3
Finally, after you’re done editing and moving around images in the carousel, right-click on the crop function along the left toolbar and select the slice tool.
Above on your screen, there will be a button titled ‘Slices From Guides’. Click that, export, and your carousel is complete!
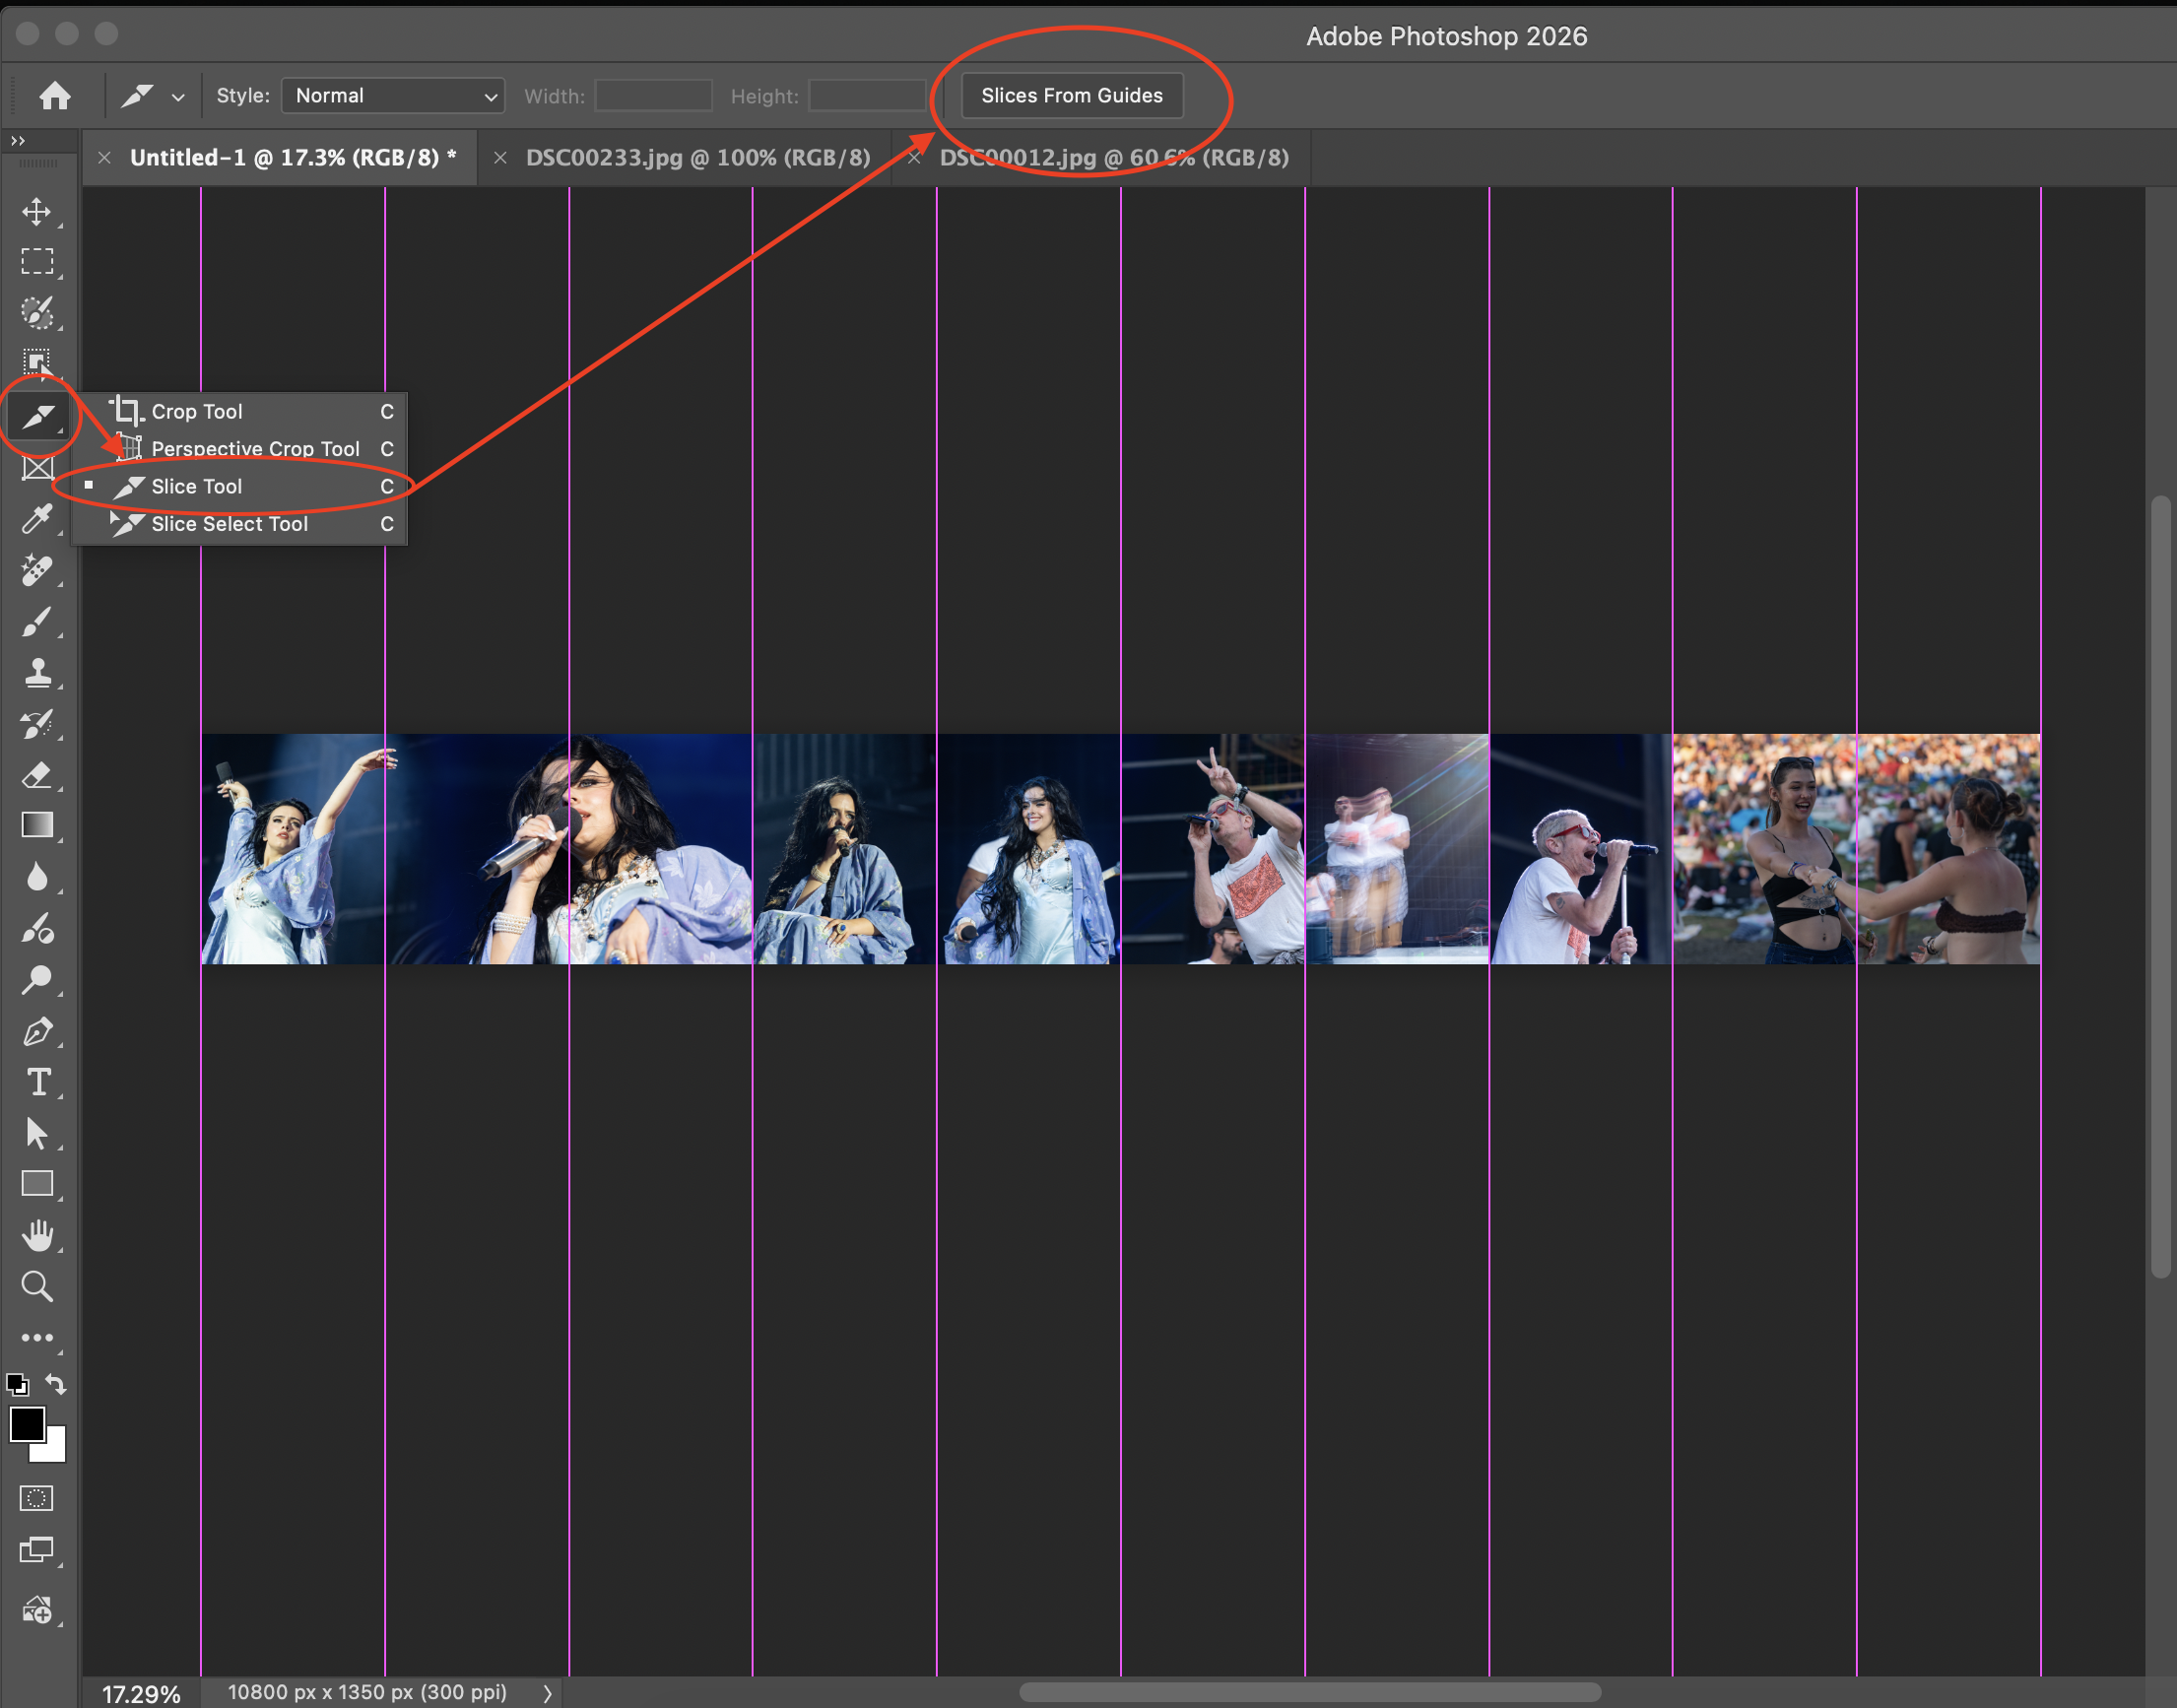
Step 3, slices from guides
Creating these carousels in Photoshop can feel convoluted at first, especially when there are programs that automate the process. But for me, the flexibility and control this method offers is a no-brainer. You don’t need to pay for another app; you have the capacity to streamline your edited photos right to Photoshop from Lightroom, and obtain the ability to customize every detail in a way that isn’t possible on other apps.
